Monday, February 13, 2012

1. To develop craft with this assignment I started by taking pictures using a manual camera. We had these photos developed at a developing store. We used these developed pictures in the darkroom using the enlargers to transfer the photos to paper. With the paper we used chemicals to develop the photos, which gave us our final product.
2. The materials that I used in my process so far was a roll of film, a manual camera, an enlarger, photo paper, and chemicals. Some of the methods and tricks I have used have been to wave my hand in front of the picture, to move the photo paper mid print, and to test all of my prints on small test strips.
3. One problem I have encountered in my creation of this project was that many of the pictures that I took were taken out of focus, which turned out in out of focus final prints.
4. I solved this problem by sorting through my photos and finding a couple that were taken in focus or had portions of the picture that were in focus.

Value Drawing

1. To develop craft with this assignment I started out by using a light pencil and making outlines of the objects in the drawing. After drawing the external lines I focused on the internal lines, making all of the contour lines look exactly as I saw them. After completing the contour lines I started to focus on the value of the objects, and I am still in the process of portraying the object's values.
2. So far in the project the tools I have used are a 6B, 2B, HB, and 2H pencil and a drawing board. The main method I used with the shading of my drawing so far (I have only just begun shading) was smearing the graphite with my pencil.
3. I had a little trouble with the scale of the objects, and having everything be to scale in the drawing.
4. I solved this problem, with the help of Mr. O, by looking more deeply into the shaped and sizes of the objects in context to the other objects.

Thursday, January 12, 2012

Texture Sculpture Reflection

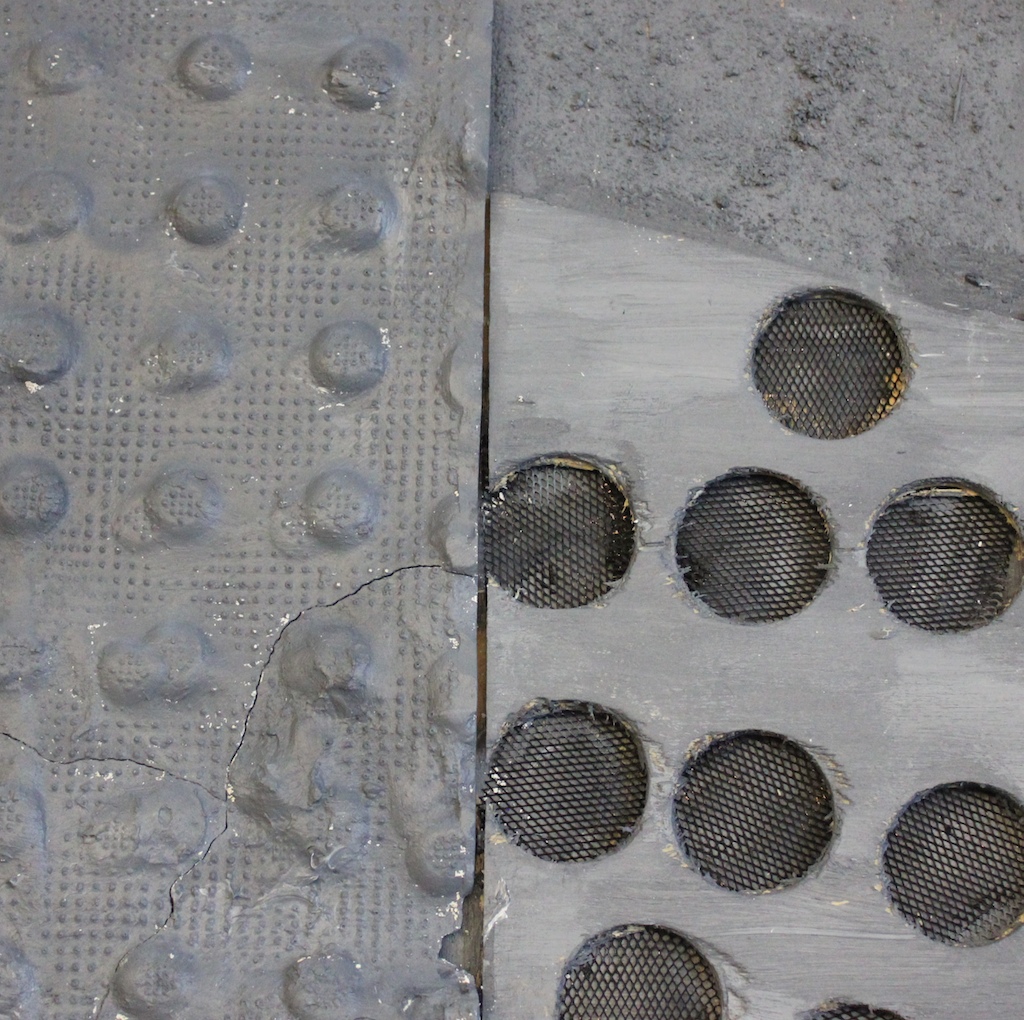
Throughout this project I worked hard to bring together a collection of different, interesting, and exciting textures. In my sculpture I had three main textures which I created out of wood, wire, sand, and plaster. I focused on keeping clear lines, and putting all of my attention towards texture rather than colors, which meant that I would have to make my entire sculpture one color, a variation of white, black, and mostly gray. I wanted to immerse myself in texture, which is why I experimented with many different mediums of creating texture and In the preparation of creating my sculpture I immediately knew what i wanted to do to create texture, and, although it was an extreme amount of work, I worked through it and came out with a sculpture that clearly shows experimentation with texture. Throughout the entire texture project I have learned to look closer at things and to imagine the texture of something when I look at it. I worked hard throughout this entire unit to get down to the bare texture of something, and showing the simplicity and intricacy of different textures. In my process of collaging I made many efforts to organize the collection of texture on paper, to see what these textures would look like interacting together later in a sculpture. i designed my sculpture around my photoshop collage, which I worked on for a long time to perfect the placement of each texture, and each textures interaction with other textures. I believe that all of my final product collages were free of technical difficulties, and that they were all fairly easy to create. The main difficulty that I encountered with my final product was that at the beginning I put too much work on my plate. I planned to drill large holes in wood, to create a net of wire, to plaster, and to make a sandpaper texture out of sand and paint. Although it was an extreme amount of work, I succeeded and finished all the aspects of my project on time. Overall, I am proud of my work throughout this unit and successfully attempted to portray texture in many ways.

Sunday, December 11, 2011

Texture Project Part 1 Reflection Questions

1. What was most interesting to you about part one of the texture project? Why?


One aspect of the project that was interesting to me was being thoughtful and simple about where to put texture and where the line between too simple and too chaotic is in collage.


2. Of the 10 photographs you took, which image best communicates the essence or "feel" of a texture? Why was that photograph so successful?


I think my photograph of the circles with mesh inside them was most successful because this photograph conveys the simple texture of scattered circles surrounded by smooth metal, and it also shows the small texture of the mesh inside of the circles, a smaller, more intricate texture.

3. Which of your three collages is most successful? What makes that collage the most successful?

My electronic collage is most successful because it has a fluidity in transitions between images. The photographs used clearly show interesting textures and blend together into a smooth, clean collage.

4. Using specific detail, describe your favorite collage.


My favorite collage shows stainless steel with a sandpapery texture in the bottom right corner and circles with mesh inside them in the bottom left corner. Across the top half of my favorite collage is plastic bups with smaller bumps around it.

5. Thinking back to Mr. O's demonstration in class on Friday, how might you use the techniques he showed you to create a 3-d representation of your 2-d collage? 

I am definitely going to use Mr. O's plaster technique with some of my textures. It is going to be difficult to make a 3-D representation of my 2-D collage because my transitions between textures are more fluid, and thus I would need all the 3-D textures to blend together in a smooth way, without harsh lines. It is going to be difficult but I am sure I will solve this dilemma.